「Blender」で3Dモデルをデザインして「UltraMotion3D」ライブラリで表示してみよう

モデルデータを表示する
以降で解説するサンプルコードをコーディングしてGoogle Chromeでindex.htmlを開くと、図8のように白いギターが表示されます。前出の「Vixar Vision」から書き出した「Guitar.js」コードには「setMaterial」メソッド、「setV」メソッド、「setI」メソッドがあるので、それを「Model3D」クラスで実装します。
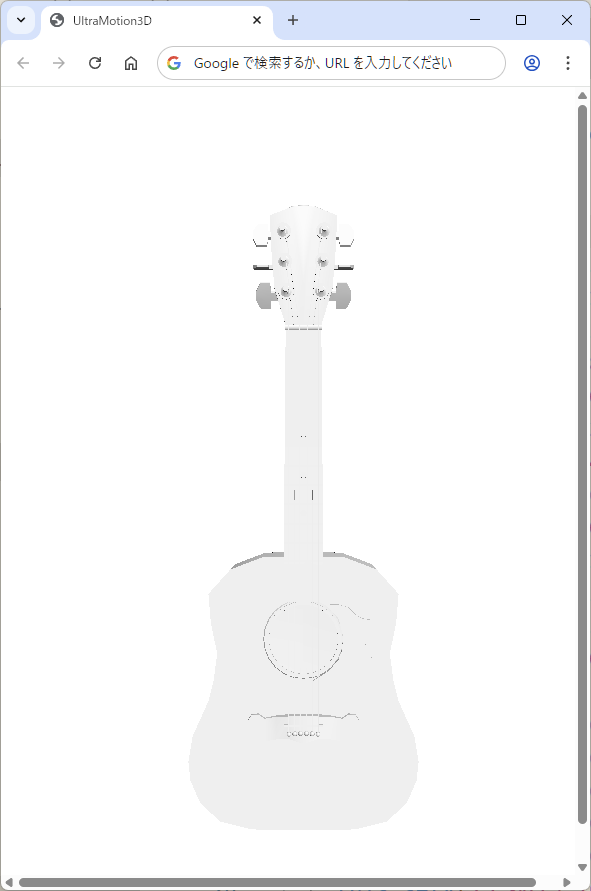
図8:Google Chromeに3Dギターを表示(再掲)
Vixar Visionで書き出したjsファイルに対応する
次のサンプルコード「lib」→「Model3D.js」ファイルのようにコーディングします。setMaterialメソッドではまだ何もしません。setVメソッドでは1頂点ずつのデータをpreVertices配列に追加します。setIメソッドではsetVで追加した頂点を指すインデックスをindices配列に追加し、頂点データをvertices配列に追加します。
・サンプルコード「lib」→「Model3D.js」ファイルclass Model3D {
constructor() {
this.preVertices = [];
this.vertices = [];
this.indices = [];
this.pos = new Vector3D(0,0,0);
this.rotate = new Vector3D(0,0,0);
this.scale = new Vector3D(1,1,1);
this.num = _num;
_num++;
}
setMaterial(r,g,b,a,dif,amb,emi,spc,power,texture) {
}
setV(x,y,z,nx=0,ny=0,nz=1,material=0,u=0,v=0) {
this.preVertices.push(x,y,z,nx,ny,nz,material,u,v);
}
setI(i0,i1,i2) {
var indices = [];
indices.push(i0,i1,i2);
for ( let i = 0; i < indices.length; i++ ) {
const j = indices[i];
const x = this.preVertices[j*9 ];
const y = this.preVertices[j*9+1];
const z = this.preVertices[j*9+2];
const nx = this.preVertices[j*9+3];
const ny = this.preVertices[j*9+4];
const nz = this.preVertices[j*9+5];
this.vertices.push(x,y,z,1,nx,ny,nz);
}
}
initBuffers() {
(中略)
}
async init() {
(中略)
}
getVertexCount() {
return ~~(this.vertexArray.length/7);
}
draw() {
(中略)
}
setTransform() {
const projectionMatrix = this.getProjectionMatrix();
_device.queue.writeBuffer(
_uniformBuffer,
4 * 16 * 0 + OFFSET_SIZE*this.num,
projectionMatrix.e.buffer,
0,
4 * 16
);
_device.queue.writeBuffer(
_uniformBuffer,
4 * 16 * 1 + OFFSET_SIZE*this.num,
_camera.e.buffer,
0,
4 * 16
);
const worldMatrix = this.getWorldMatrix();
_device.queue.writeBuffer(
_uniformBuffer,
4 * 16 * 2 + OFFSET_SIZE*this.num,
worldMatrix.e.buffer,
0,
4 * 16
);
let wvMatrix = this.getWorldViewMatrix();
let normalMatrix = Matrix3D.inverse(wvMatrix);
normalMatrix = normalMatrix.transpose();
_device.queue.writeBuffer(
_uniformBuffer,
4 * 16 * 3 + OFFSET_SIZE*this.num,
normalMatrix.e.buffer,
0,
4 * 16
);
}
getProjectionMatrix() {
(中略)
}
getWorldMatrix() {
(中略)
}
getWorldViewMatrix() {
const worldMatrix = this.getWorldMatrix();
return Matrix3D.multiply(_camera,worldMatrix);
}
}
【サンプルコードの解説】
preVertices配列は一時的にGuitarモデルの頂点データを保持します。
「num」プロパティはModel3Dのインスタンスの一意の番号の「_num」変数を代入します。
setMaterialメソッドは次回マテリアルを追加します。
setVメソッドはpreVertices配列に頂点(x,y,z)、法線(nx,ny,nz)、マテリアル番号、UV座標(u,v)を追加します。
setIメソッドはindices配列にインデックス(i0,i1,i2)を追加し、vertices配列に頂点(x,y,z,1)、法線(nx,ny,nz)を追加します。
getVertexCountはvertexArrayの長さをvertices配列の1頂点の7データ(1頂点と1法線のデータ数)で除算して、頂点数を取得します。
「setTransform」メソッドでプロジェクション行列のオフセットを4 * 16 * 0 + OFFSET_SIZE*this.numに、ビュー行列のオフセットを4 * 16 * 1 + OFFSET_SIZE*this.numに、ワールド行列のオフセットを4 * 16 * 2 + OFFSET_SIZE*this.numに、法線行列のオフセットを4 * 16 * 3 + OFFSET_SIZE*this.numにして、ユニフォームバッファに渡します。
法線行列はワールド行列とビュー行列を乗算した行列の逆行列を転置した行列です。
シェーダーに法線を追加
次のサンプルコード「lib」→「WGSL.js」ファイルでは、ユニフォーム定数に法線行列も加わります。法線は面の向きを示すベクトルで、法線行列はその法線ベクトルをワールドビュー変換後も正しい方向に保つための行列です。頂点シェーダーで法線に法線行列を乗算した「normal」プロパティも「VertexOutput」構造体に加えて戻り値を返します。
フラグメントシェーダーでは、vec3f(-1.0,-2.0,-4.0)を正規化したベクトルがライトの向きになります。ライトの向きに対して法線がより正反対の向きに近くなるほどよく光が当たるため、明るくなるようにグレーから白に色をグラデーションします。
・サンプルコード「lib」→「WGSL.js」ファイルconst vertWGSL = `
struct Uniforms {
projectionMatrix : mat4x4f,
viewMatrix : mat4x4f,
worldMatrix : mat4x4f,
normalMatrix : mat4x4f,
}
@group(0) @binding(0) var uniforms : Uniforms;
struct VertexOutput {
@builtin(position) position : vec4f,
@location(0) normal : vec3f,
}
@vertex
fn main(
@location(0) position: vec4f,
@location(1) normal: vec3f,
) -> VertexOutput {
var output : VertexOutput;
output.position = uniforms.projectionMatrix *
uniforms.viewMatrix * uniforms.worldMatrix * position;
output.normal = (uniforms.normalMatrix * vec4f(normal,1)).xyz;
return output;
}
`;
const fragWGSL = `
struct VertexOutput {
@builtin(position) position : vec4f,
@location(0) normal : vec3f,
}
@fragment
fn main(fragData: VertexOutput) -> @location(0) vec4f {
var lightDirection = normalize(vec3f(-1.0,-2.0,-4.0));
var normal = normalize(fragData.normal);
var diffuseLightWeighting = (1+dot(normal,lightDirection))/2;
var color = vec3f(1.0,1.0,1.0)*clamp(diffuseLightWeighting,0.0,1.0);
return vec4f(color.rgb,1.0);
}
`;
法線もシェーダーに渡す
複数のモデルを描画することも考慮して、ユニフォームバッファのサイズの最大値を決めます。パイプラインで頂点シェーダーの「main」関数に渡す頂点と、さらに法線(normal)もセットします。
・「lib」→「UltraMotion3D.js」ファイルvar _num = 0;
var _camera = new Matrix3D();
var _fov = 45.0;
const MAX_NUM = 10000;
const UNIFORM_BUFFER_SIZE = 4 * 16 * 4; // 4byte(float32) * 4x4 matrix * 4
const OFFSET_SIZE = UNIFORM_BUFFER_SIZE; //256の倍数
var _passEncoder = null;
async function initWebGPU(canvas) {
if (!navigator.gpu) {
throw Error('WebGPU not supported.');
}
const adapter = await navigator.gpu.requestAdapter();
if (!adapter) {
throw Error('Could not request WebGPU adapter.');
}
_device = await adapter.requestDevice();
_canvas = document.getElementById(canvas);
_context = _canvas.getContext('webgpu');
_presentationFormat = navigator.gpu.getPreferredCanvasFormat();
_context.configure({
device: _device,
format: _presentationFormat,
alphaMode: 'premultiplied',
});
// create a render pipeline
_pipeline = setPipeline(vertWGSL,fragWGSL);
_uniformBuffer = _device.createBuffer({
size: UNIFORM_BUFFER_SIZE + OFFSET_SIZE * MAX_NUM,
usage: GPUBufferUsage.UNIFORM | GPUBufferUsage.COPY_DST,
});
window.addEventListener("resize", resize, false);
resize();
init();
requestAnimationFrame(everyFrame.bind(everyFrame));
}
function setPipeline(vertexWGSL,fragmentWGSL) {
const pipeline = _device.createRenderPipeline({
layout: 'auto',
vertex: {
module: _device.createShaderModule({
code: vertexWGSL,
}),
entryPoint: 'main',
buffers: [{
attributes: [
{// position
shaderLocation: 0,
offset: 0,
format: 'float32x4',
},{// normal
shaderLocation: 1,
offset: 4*4,
format: 'float32x3',
},
],
arrayStride: 4*(4+3), // 4byte(float32) × (4+3)個
stepMode: "vertex",
},],
},
fragment: {
module: _device.createShaderModule({
code: fragmentWGSL,
}),
entryPoint: 'main',
targets: [ // 0
{
format: _presentationFormat,
},
],
},
primitive: {
topology: 'triangle-list',
},
depthStencil: {
depthWriteEnabled: true,
depthCompare: 'less',
format: 'depth24plus',
},
});
return pipeline;
}
(後略)
【サンプルコードの解説】
「_num」変数は一意のモデルの番号です。
「MAX_NUM」定数はモデルの最大数を1万個にします。
「initWebGPU」関数では「createBuffer」でサイズを UNIFORM_BUFFER_SIZE + OFFSET_SIZE * MAX_NUM に設定したユニフォームバッファを作成し、「_uniformBuffer」に代入します。
「setPipeline」関数で、頂点シェーダーの「shaderLocation」が0番の頂点座標に加えて、shaderLocationが1番の法線ベクトルをオフセット4*4(なぜならshaderLocationが0番の頂点がfloat32の4バイト*4だから)にセットします。「arrayStride(配列の歩)」には1頂点ごとのサイズとして1頂点と1法線のサイズ「4*(4+3)」を渡します。
今まで書いてきた本やWeb記事はある程度プログラミングの知識がある人向けでしたが、「初めてプログラミングをする人にどう教えるか」を考えたら、やっぱり「頭を使ってプログラミングすればすぐに理解できる」ということです。
「写経」というコードを書き写す勉強方法を耳にしますが、まず意味はありません。考えてコードを書けばすぐにプログラミングができるようになります。「丸覚え」ではなく「理解」です。「こうしたら動く」「ここがこう間違っているから、こうしたら良い」と考えれば良いだけです。記憶するにも、丸暗記より映像をイメージする方が覚えられますね?「プログラミングは頭を使う」とはそういうことなのです。
おわりに
今回はBlenderでギターの3Dモデルを作成し、それをUltraMotion3Dで描画しました。さらに法線も反映して、面の向きに合わせて陰影も加えてみました。
次回は、さらにギターに白以外の色を反映したマテリアルを設定していきます。